Thursday, November 1, 2012

English tea, clotted cream and strawberry jam


I had a craving for scones with cotted cream and strawberry jam. I had two choices
1. Hop on a plane and travel to england
2. Try to make it myself
Here is a recepie that I found 
Pour three cups of cream into a heavy-bottomed oven-safe pan. The cream should come up the side of the pan somewhere between one and three inches.
Cover the pan and put it in the oven on 180 F.

Leave the covered pan in the oven for at least 8 hours. 
You'll know it's done because there will be a thick yellowish skin above the cream. That skin is the clotted cream.
Let the pan cool at room temperature, then put it in the refrigerator for another 8 hours.
Remove the clotted cream from the top of the pan. 
The cream that is underneath it can still be used for baking and I used it for baking my scones.

I used store bought cream this time, but
next time I'm going to try this with unpasteurised milk and see if there is any difference.


Sunday, September 23, 2012

Rillettes de canard


Rillettes was usually made with pork, but today there are meny different kinds, some even with fish.
Today I made it with duck

You need
1 duck
5-6 stalks of thyme
5-6 bayleafs
 1,5 tbs salt
1,5 tbs whole pepper corns

Cut the duck and remove the skin and fat (Cook the skin and fat in a separate pot click HERE for instructions)
Put all the ingredients in a pot and cover with water
Give it a boil and let it simmer on medium heat for about 2 hours, until the meat is tender and comes off the bones by itself
Shred the meat 
and continue simmering the meat with 1 cup of the broth and 1/4 cup of the fat for about an hour.
Fill jars or little clay pots with the meat and top it with a little duck fat and let them cool
Enjoy the rillettes with bread or use it in salads if you like.
Save the fat and broth for later, you can make nice gravy and enrich soups with the broth.
The fat is nice to sautee vegetable in.

Fritons de canard


If you like bacon rachers, you might like this luxury version made of duck skin.
I am making duck rillettes and this is what you get if you heat up the duck skin and fat.

Put the skin and fat in a pot and heat up.
I use high heat in the beginning, but when you hear it sizzling turn the heat down to medium heat.
Then I cut the skin into strips
and put it back into the pot.
let it simmer until it is golden.
When it is done, remove the raschers and let them drain on paper towels
In a mortar I pound a little salt to dust, and then sprinkle a light salt dust over the raschers.


Saturday, September 22, 2012

Sugarfree cup cakes and sugar free creamy vanilla icing


As a diabetic I should be more carefull with what I eat and it is not always easy to find nice sugarfree cakes. I wanted to try the Magnolia Bakery vanilla cup cakes with their creamy vanilla icing and make it sugar free and here is the result.

Ingredients

1 1/2 cups self-rising flour
1 1/4 cups all-purpose flour
1 cup (2 sticks) unsalted butter, softened
3/4 cup Splenda
1/4 cup powdered Xylitol
(you can probably use just Splenda)
4 large eggs, at room temperature
1 cup milk
1 teaspoon vanilla extract

Preheat oven to 350 degrees F.
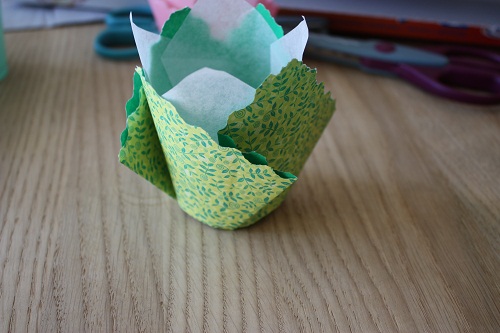
Line 2 (1/2 cup-12 capacity) muffin tins with cupcake papers.

In a small bowl, combine the flours. Set aside.

Mix all the dry ingredients in a bowl and add butter a little at the time, mix this on medium speed untill the mixture has the texture as sand. Beat the egg and add half of it to the dry ingredients and pour the rest in with the milk and add the vanilla, pour this mixture in with the rest and blend untill all ingredients are incorporated but do not over beat. Carefully spoon the batter into the cupcake liners, filling them about 3/4 full. Bake for 20 to 25 minutes, or until a cake tester inserted into the center of the cupcake comes out clean.

Cool the cupcakes in tins for 15 minutes. Remove from the tins and cool completely on a wire rack before icing.

Since it is without sugar the cup cakes are a little spongy, but still moist and fluffy.

I'm practicing the swirl and still 39 more hours to go:)


Icing
6 tablespoons all-purpose flour
2 cups milk
2 cups (4 sticks) unsalted butter, softened
1 cup splenda
2 teaspoons vanilla extract

In a medium-size saucepan, whisk the flour into the milk until smooth. Place over medium heat and, stirring constantly, cook until the mixture becomes very thick and begins to bubble, 10-15 minutes. Cover with waxed paper placed directly on the surface and cool to room temperature, about 30 minutes.

In a large bowl, on the medium high speed of an electric mixer, beat the butter for 3 minutes, until smooth and creamy. Gradually add the slenda, beating continuously for 3 minutes until fluffy. Add the vanilla and beat well.

Add the cooled milk mixture, and continue to beat on the medium high speed for 5 minutes, until very smooth and noticeably whiter in color. Cover and refrigerate for 15 minutes (no less and no longer—set a timer!). Use immediately.

Sunday, August 26, 2012

Plum preserve


The plums in my garden are ripening so why not make plum preseve.
Here is an easy recipe.

1 kg plums
rinsed and diced
350-500 g sugar
add a little by little so you get the eweetness you want
3 vanillapods

Cook the diced plums tender,
add sugar and vanillapods.
Let everything cook until the sugar is desolved.
Pour into sterilized jars and enjoy:)
Try to fill the jars as much as possible without the preserve touching the edge of the jar, it will keep better  and longer.


Sunday, May 6, 2012

Cake for my husbands cousin

I  had the honor to make THE cake for my husbands cousins confirmation, a confirmation si a big event in Norway, you come of age, become an adult. This tradition is usually celebrated with a big party, where you invite your family and the people most inportant to you.
The leading lady this day wore a trditional Norwegian costume called a bunad, I used the colourr of the bodice of the dress, the rose I kept natural as the colour of her linnen blouse and the grey represents the silver she was wearing.
I used a silicone mold to make the reliefs on the cake
and I diluted some black food colouring to make the silver look old,
and dusted some silver dust to make it shimmer a little
I think she was happy with the cake
Made some cupcakes also with the same colour scheme for my children to munch on  :)


Wednesday, April 25, 2012

Soy based pudding


I suddenly got the craving for Taho a filipino drinck/dessert, this is one of my childhood memories from my trips to the Philippines, the pudding is called Douhua in chinese  which is more commonly used in savory dishes. My problem was that I did not have gypsum, so I tried to make itg with agar agar instead. The result was nice, but not as creamy as if I had used gypsum and it is a nice substitute for flan or caramel custard/pudding for people who are allergic to eggs or who are lactose intolerant.

Monday, April 23, 2012

Salvation army thrift shop find


Just before easter I found a wooden platter with norwegian "rosemaling" for 35 kroners around  $6-7.
The "rosemaling" technique is very nice and interesting, but it doesn't fit in my house, so I re painted and drew some lines and dots on it. 

Sunday, April 22, 2012

Toasted peanuts with garlic


This simple snack bought from street vendors is one of the snacks I remeber from my first trip to the Philipines. Warm and toasty with garlic and salt sold in small paper bags.

Tuesday, April 17, 2012

Tulip baking cups

I can see from visit on this blog that the baking cups are the most interesting:)
and since I got the idea, I have found easier way to make them and make them nicer.
When I say got the idea, I mean to make homemade ones, because tulip baking cups already existed, but here in Norway they are quite expensive, about $ 12.00 one pack from wilton and on-line they are $ 3.99
I have used origami paper and baking paper 15x15 cm or 6x6 inches and cut the origamipaper so they will have decorative edges.
Made folds as in the picture, not all the way through the middle, you can but I did not.
wraped it around my mold,  a cup the size of the indentations of my cup cake tray
then pressd the folds

and folded them to the side

at the bottom you vil have little corners by the folds sticking up that you need to press dovn.

I usually stack them togheter between to cups so to press them into shape
I also make some of bakingpaper
and put them togeter
for extra decoration I tie a string or a ribbon around it.
Hope the instructions are understandable.
Here are some other that I made :)
Earlier posts about home made baking cups Here and Here

Related Posts Plugin for WordPress, Blogger.../a>